The Ecessa cloud introduces Restore Points that store vital information related to each device which can then be imported onto the same or a different device (such as a replacement or upgrade). Any Ecessa device allows the configuration to be exported to a user’s computer and then imported. However, there are some important components, such as certificates, that would also need to be exported and imported manually. The Ecessa cloud restore points include all the necessary files to get a device up and running just as it was when the restore point was saved with minimal time and effort.
The Ecessa device will perform a periodic check to determine if a configuration change has been made. If a change was made, the device will create a restore point and send it to the cloud. To find the existing restore points, log into the cloud with the provided cloud login URL, username, and password.
Restore points are saved to the cloud and are available regardless of the unit status. In this example, the Dallas site is down and Seattle site is up but the restore points for both are still accessible from the cloud.
Select the appropriate device and click the Restore tab which will display all of the restore points saved for the device.
Restore points are grouped by age and each age group will keep a different number of restore points. The following table describes the boundaries for each age group and the maximum number of restore points saved for the group.
|
Restore Point Age Group |
Includes Restore Points with a Lifetime of |
Maximum # of Group Restore Points |
|
Recent |
Up to 7 days old |
9 |
|
Weekly |
8 days – 1 month |
6 |
|
Monthly |
Older than 1 month |
3 |
*Age is determined by current system date compared to the date the restore point was saved.
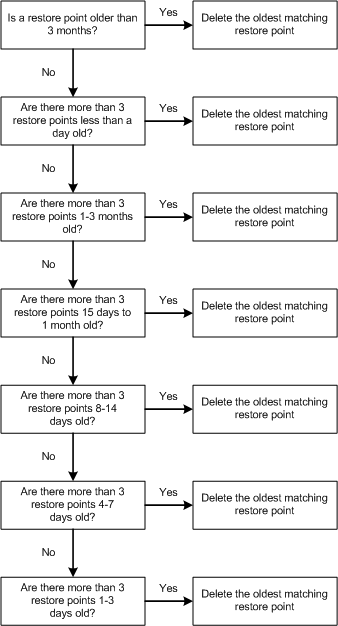
There can be a total of 18 restore points saved in the cloud. If an additional restore point is saved and the total exceeds 18, then an existing file will be removed per the following conditions:
Using Restore Points
To import a restore point to an Ecessa device, the file must be downloaded (exported) from the cloud. From the Restore tab, click the Export button for the desired restore point. An Export window will be opened.
Enter your username and password to export the configuration of this device, and then click the blue Export button.
Log in to the device which will receive the restore point. Go to Get/Set Configuration located in the left-hand menu. On the Import/Export tab there will be an Import Restore Point section.
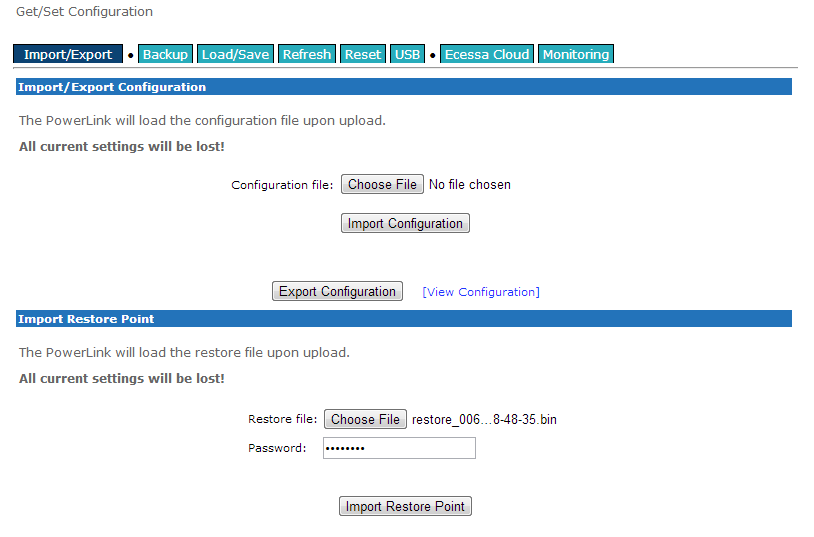
Click the Choose File button to open a dialog box and select the restore point file saved previously. Enter the import password and then click Import Restore Point.
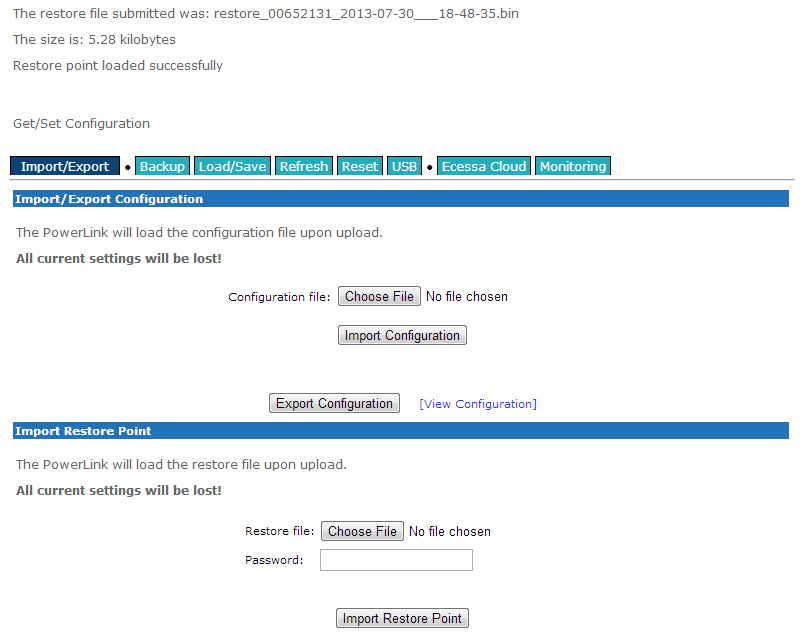
Changes will take effect immediately – if the IP configuration changed with the import then the connection to the device will have to be re-established using the new configuration settings. If the IP configuration did not change the page should update with a success message.
Caveats
1. Restore point functionality requires firmware version 9.0.11 or later.
2. The restore point import interface requires firmware version 9.1 or later.
0 Comments